 Retro
Retro  Country
 Modern
.jpg)
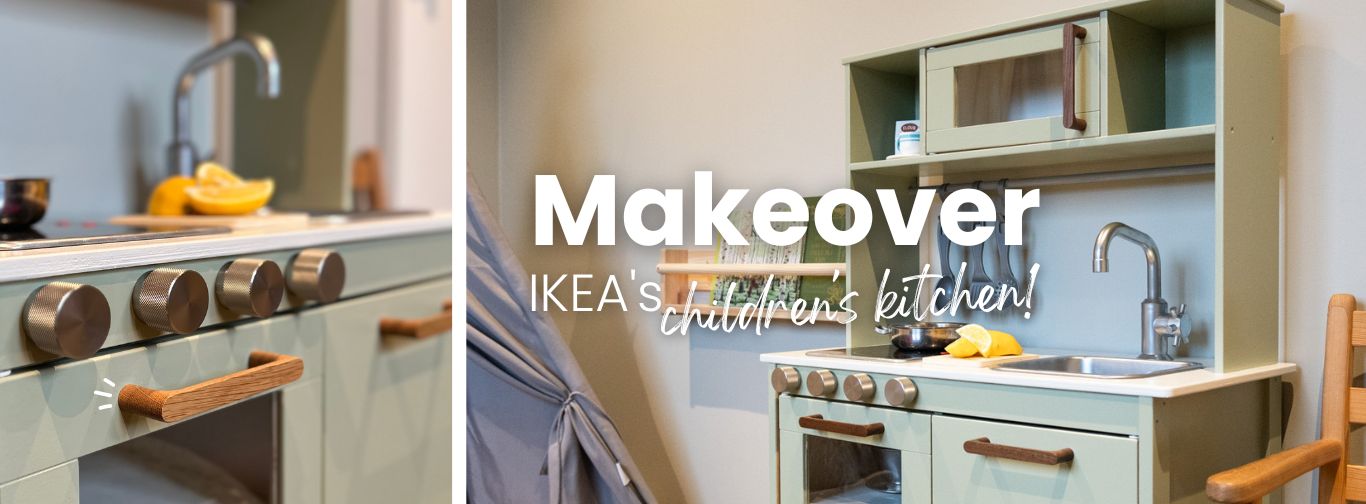
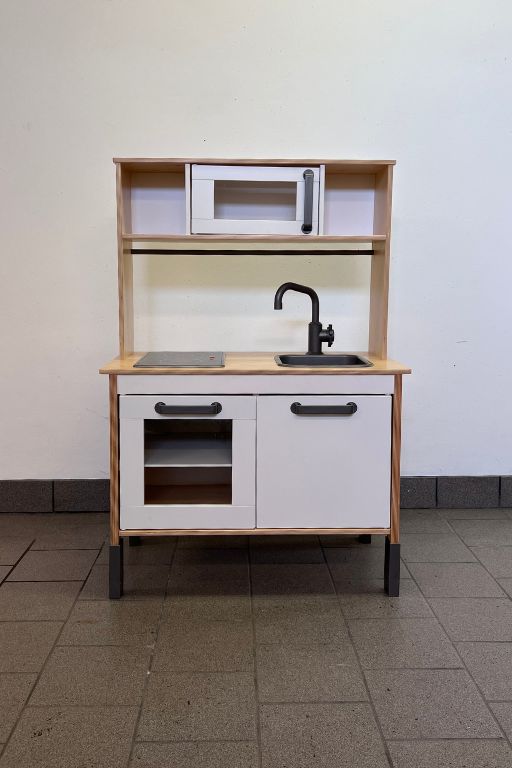
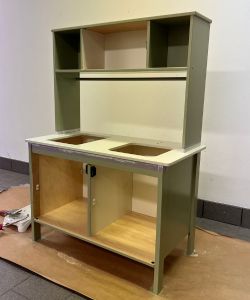
BEFORE
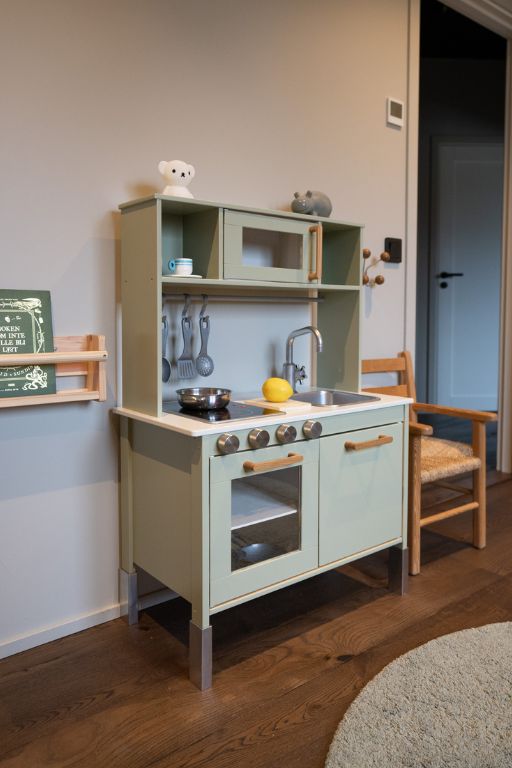
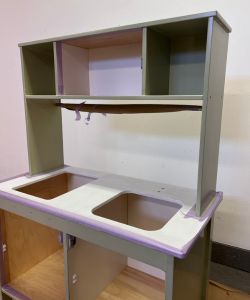
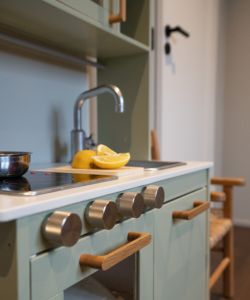
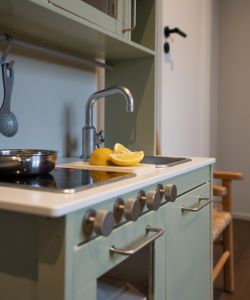
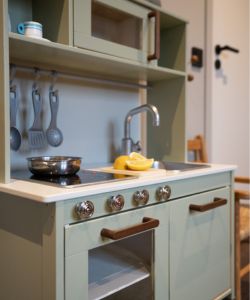
AFTER
We can probably agree that there was a very big difference! The same kitchen, but with a new touch of modernity. The toy kitchen has been given new life and is now more of a piece of furniture than just a toy, and you know what?
- It has been shown in several studies that color is essential for children's development and encourages curiosity to want to explore the world.
Do you also want to give your children's toy kitchen from IKEA a makeover but are unsure what you need and how to do it? We have created a guide that shows step-by-step how we went about creating an entirely new feel and character with color, knobs, and handles.
- A real IKEA hack, we promise! -
- A real IKEA hack, we promise! -
.jpg)
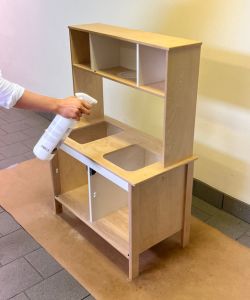
1. Cover the floor with cardboard to protect the surface against paint spillage.
There are two choices to make before proceeding to the next step. Either disassemble the kitchen to get it down to its components or redo it once assembled. We chose to redo it when it was fully assembled.
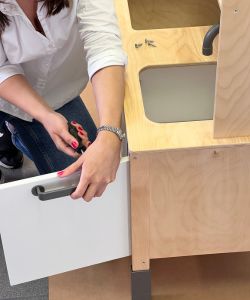
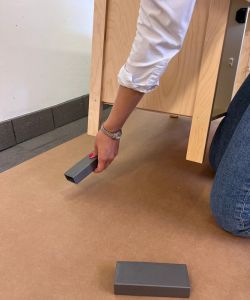
2. Remove the parts that are not to be painted: the stove, the sink, the faucet, the legs, and the fittings. Clean the kitchen with paint cleaner. Spray over the kitchen and then use a damp cloth to remove any dirt stuck to the surface.
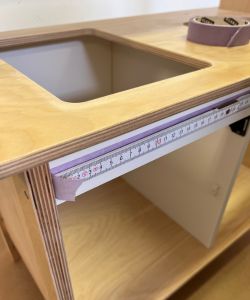
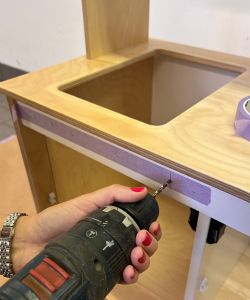
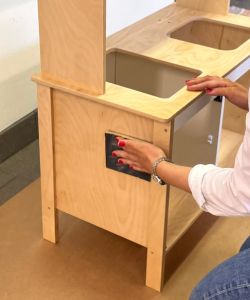
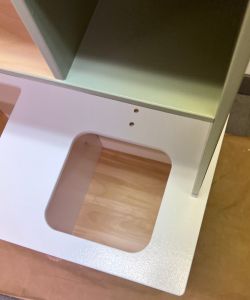
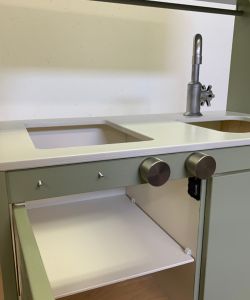
3. Decide where you want the knobs (stove knobs) to sit. Start by placing a strip of masking tape in the desired location. You can then easily draw and mark where you want the knobs. The masking tape also gives you a matte surface to put the drill against and prevents the drill from sliding on the substrate.
When you have measured where
you want the holes, drill through the tape
with a drill that fits M4 screws.
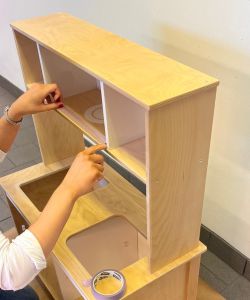
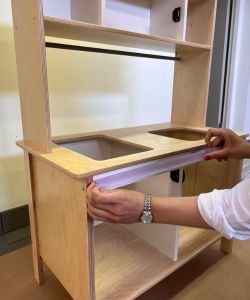
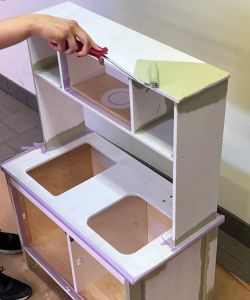
4. Use masking tape to protect the surfaces, not to be painted. We chose to mask the inside of the microwave, the oven, the kitchen cabinet, and the doors with plastic glass.
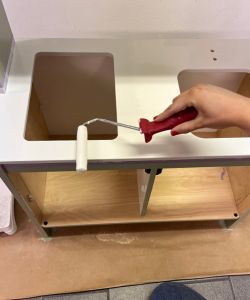
5. Take out the adhesive base color and mix well, then prime one layer. Use a roller for the large areas and a brush to access the smaller spaces. The adhesive primer ensures the lacquer and carpentry paint adheres properly and the kitchen has an even surface.
- Let the paint dry.
- Let the paint dry.

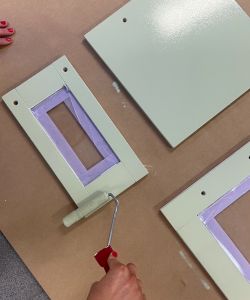
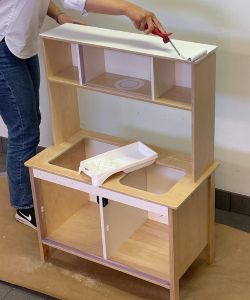
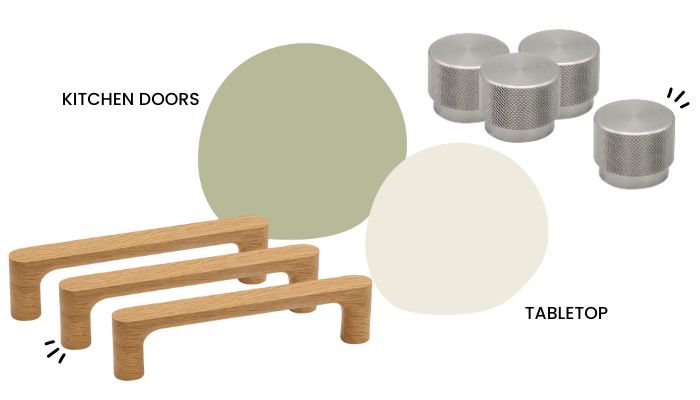
7. When the adhesive primer has dried, it's time for the first layer of the lacquer and carpentry paint! Mix the paint thoroughly and then use a paintbrush or roller to apply the paint. We started by painting everything except the worktop in Pistachio Green 12 - NSC S 3010-G60Y.
- Tip!
Mask the worktop if you
choose to have it in a different
color than the rest of the kitchen.
Let the paint dry, then paint the desired parts of the kitchen one more time to ensure an even surface and that the paint covers properly.
- Remove the masking tape when you have finished painting the last layer.
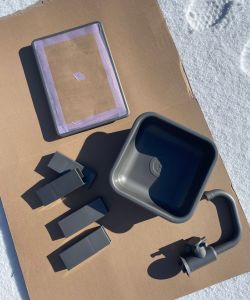
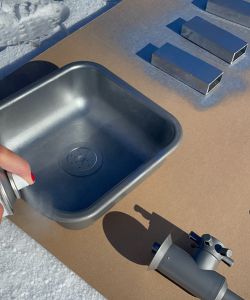
8. While the paint is drying, mask the stovetop, and place the legs, the sink, the faucet, and the stove on a suitable surface that you are not afraid of, for example, a piece of cardboard. Go out and spray all the details in the desired color.
We used Chrome spray to get a chrome feel. Take in the products and let the spray dry properly; it is essential not to touch the products too early, as this can damage the new surface.
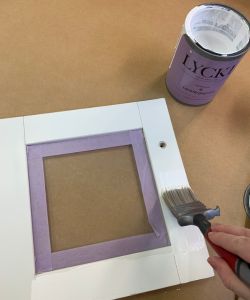
9. Paint the worktop in the desired color; we chose Morning Dew 18 – NCS S 1002-Y.
Let the paint dry and then paint another layer to ensure a smooth surface and the paint covers properly.
Remove the masking tape when you
have painted the last layer & let the paint dry.
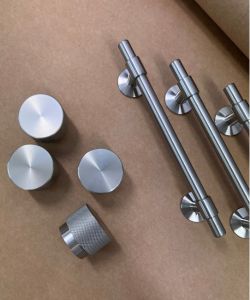

10. Once the paint has dried, it's time to prepare new handles and knobs!! The C/C measurement of the existing holes is 128mm. Choose handles and knobs that are fun to spin and have a grooved or matte surface for a good grip for little hands.
Remember that it should be easy for little hands to open the doors and play in the kitchen. There are endless combinations of colors, along with knobs and handles. Complete the kitchen with matching hooks on the wall in the children's room. A perfect hanging for the thick sweaters that have become too warm during play. Or why not hang up a cute little dressing gown, perfect for colder mornings.
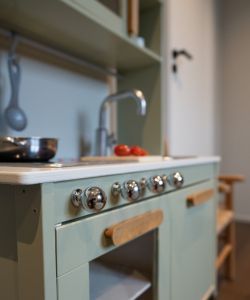
Voilà!
The children's kitchen has an entirely new feel and character!
You need:
- IKEA Duktig play kitchen
- Painter's wash
- Covering cardboard
- Paint: adhesive primer & matt lacquer paint
- Brush & roller
- Masking tape
- Spray paint
- New knobs & handles
- Drill machine
- Ruler
- Painter's wash
- Covering cardboard
- Paint: adhesive primer & matt lacquer paint
- Brush & roller
- Masking tape
- Spray paint
- New knobs & handles
- Drill machine
- Ruler
Good luck with updating your children's IKEA kitchen!
We love seeing other people's home fixes come to life; if you want to be seen here below, don't forget to tag your photos with @beslagonline or #beslagonline
We look forward to sharing your project and inspiring others together.
BEFORE
AFTER
We can probably agree that there was a very big difference! The same kitchen, but with a new touch of modernity. The toy kitchen has been given new life and is now more of a piece of furniture than just a toy, and you know what?
- It has been shown in several studies that color is essential for children's development and encourages curiosity to want to explore the world.
Do you also want to give your children's toy kitchen from IKEA a makeover but are unsure what you need and how to do it? We have created a guide that shows step-by-step how we went about creating an entirely new feel and character with color, knobs, and handles.
- A real IKEA hack, we promise! -
- A real IKEA hack, we promise! -
1. Cover the floor with cardboard to protect the surface against paint spillage.
There are two choices to make before proceeding to the next step. Either disassemble the kitchen to get it down to its components or redo it once assembled. We chose to redo it when it was fully assembled.
2. Remove the parts that are not to be painted: the stove, the sink, the faucet, the legs, and the fittings. Clean the kitchen with paint cleaner. Spray over the kitchen and then use a damp cloth to remove any dirt stuck to the surface.
3. Decide where you want the knobs (stove knobs) to sit. Start by placing a strip of masking tape in the desired location. You can then easily draw and mark where you want the knobs. The masking tape also gives you a matte surface to put the drill against and prevents the drill from sliding on the substrate.
When you have measured where
you want the holes, drill through the
tape with a drill that fits M4 screws.
4. Use masking tape to protect the surfaces, not to be painted. We chose to mask the inside of the microwave, the oven, the kitchen cabinet, and the doors with plastic glass.
5. Take out the adhesive base color and mix well, then prime one layer. Use a roller for the large areas and a brush to access the smaller spaces. The adhesive primer ensures the lacquer and carpentry paint adheres properly and the kitchen has an even surface.
- Let the paint dry.
- Let the paint dry.
7. When the adhesive primer has dried, it's time for the first layer of the lacquer and carpentry paint! Mix the paint thoroughly and then use a paintbrush or roller to apply the paint. We started by painting everything except the worktop in Pistachio Green 12 - NSC S 3010-G60Y.
- Tip!
Mask the worktop if you
choose to have it in a different
color than the rest of the kitchen.
Let the paint dry, then paint the desired parts of the kitchen one more time to ensure an even surface and that the paint covers properly.
- Remove the masking tape when you have finished painting the last layer.
8. While the paint is drying, mask the stovetop, and place the legs, the sink, the faucet, and the stove on a suitable surface that you are not afraid of, for example, a piece of cardboard. Go out and spray all the details in the desired color.
We used Chrome spray to get a chrome feel. Take in the products and let the spray dry properly; it is essential not to touch the products too early, as this can damage the new surface.
9. Paint the worktop in the desired color; we chose Morning Dew 18 – NCS S 1002-Y. Allow the paint to dry, and then paint another coat to ensure an even surface and that the paint covers properly.
Remove the masking tape when
you paint the last layer & let the paint dry.
10. Once the paint has dried, it's time to prepare new handles and knobs!! The C/C measurement of the existing holes is 128mm. Choose handles and knobs that are fun to spin and have a grooved or matte surface for a good grip for little hands.
Remember that it should be easy for little hands to open the doors and play in the kitchen. There are endless combinations of colors, along with knobs and handles. Complete the kitchen with matching hooks on the wall in the children's room. A perfect hanging for the thick sweaters that have become too warm during play. Or why not hang up a cute little dressing gown, perfect for colder mornings.
Voilà!
The children's kitchen has an entirely new feel and character!
You need:
- IKEA Duktig play kitchen
- Painter's wash
- Covering cardboard
- Paint: adhesive primer & matt lacquer paint
- Brush & roller
- Masking tape
- Spray paint
- New knobs & handles
- Drill machine
- Ruler
- Painter's wash
- Covering cardboard
- Paint: adhesive primer & matt lacquer paint
- Brush & roller
- Masking tape
- Spray paint
- New knobs & handles
- Drill machine
- Ruler
Good luck with updating your
children's IKEA kitchen!
We love seeing other people's home fixes come to life; if you want to be seen here below, don't forget to tag your photos with @beslagonline or #beslagonline
We look forward to sharing your project and inspiring others together.